Showing posts with label bird. Show all posts

Friday, June 22, 2012

Life's a hoot


Here is the little owl necklace that I made for the step-by-step project for the Art Jewelry magazine article.


He does look like a cute little owl, don't you think?


Notice any similarities to a visitor to our garden?


If you follow the article and make your own, please send me a photo. I'd love to see your creation!

Monday, May 21, 2012

Quentin Quail

As I mentioned in a recent blog post, I've made a new style necklace of my good friend Quentin Quail.  I hope you like him.


It is like bas relief in silver.


Quentin wandering in the moonlight....  How romantic.  No wonder I always see him with Queenie!

Friday, May 11, 2012

Quentin Quail is back

We have lots of Quentin and Queenie pairs of quails running around the neighborhood right now, so it was timely that I got a request to make a Quentin necklace as a mother's day present.


Quentin has little running shoes on, as they always do seem to run everywhere very quickly!   I was sat on the porch the other day and Quentin walk slowly past me - not noticing I was there, but then Queenie came up behind him, saw me - and ran so fast, so Quentin ran too!  They are so lovely to watch.


Anyhow - my Quentin customer was a delight. He was buying the necklace for one of his daughters.  I do hope she likes it. I made a different styled Q necklace this week too, but haven't finished it yet. Hopefully early next week I'll show it to you.

Monday, April 30, 2012

Songbirds


I first made my songbird necklace and earrings early on when I started out with metal clay. This week, I made some more with a slightly different design.


This time, I've made them flat backed, instead of a complete 3D bird.  They have always been a best seller, and there must be lots of these little songbirds all over the world.  


As someone who likes long necklaces, I thought the lariat version might be nice too. There's something to be said for keeping designs simple, don't you think?

Saturday, March 24, 2012

Beautiful birds

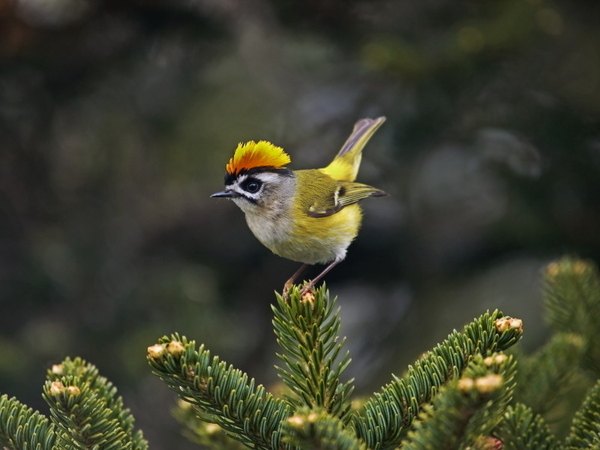
A friend of mine just emailed me these lovely photos of beautiful birds.  So I thought I'd share them with you.  Thanks Janet.  They definitely add some cheer to a wet Saturday. This first one looks like he has real attitude!


Hmmm. Maybe I need to expand my silver bird creations and create some cool chickens or flame crests with copper top feathers!

Monday, March 19, 2012

Back at it!

As you may well have noticed, my silver making has been on hiatus, but today, I got back at it!

Since the beginning of the year, my focus has been elsewhere, but now I'm hoping I am at a stage where I can find a balance with other areas of my life and make time for jewelry again.


The change started at the beginning of the year when I went back to my studies.  A few years ago, I completed my masters in health psychology and then trained as health coach, but at the beginning of this year, decided that I wanted to specialize in helping those with cancer, so since January I've been studying to become a cancer coach.  I'd previously trained as a cancer guide, but this new training was much more thorough.  I'm progressing with it - not quite finished yet - but that is what my mind has been focussing on.  And I'm loving it.

My goal is to do some health coaching and also some jewelry. But my ideal is that my jewelry business can support my health coaching business enabling me to coach cancer patients free of charge. One business, supporting the other.

The cancer topic is making it's way into my jewelry too and so you'll see some jewelry coming up - both new and old designs, that is based on affirmations to help us on our way with chronic diseases or difficult times in our lives. For example, like this "bird in the hand" necklace.  A great reminder for us to be grateful for what we have, instead of always wanting things just out of our grasp.


I have a blog for my health coaching business - Tickety-boo Health Coaching and I should finish developing my website in the next month or so.  That will really tell you what it is all about. I plan to run programs locally but also develop an e-program for cancer patients.  I'll let you know here, in case you are interested.

So I thank you for your patience as I've been developing another aspect of myself.  It's a great journey and who knows where it'll all lead.  But I can tell you, it felt good to get my hands in metal clay again today :-D

Wednesday, December 28, 2011

52/52 Bird a week challenge - Given wings, where might you fly?


Gosh, the last week of the year and that means my 52nd bird of the year.  Yes, this year I have made a different bird each week of the year for the "Bird a week challenge" that I started.  To end the year, I wanted my piece to somehow take me into the New Year...and to be an inspiration for what the new year will bring.


And thus, here is: "Given wings, where might you fly?"


They are ear thread earrings of flying silver birds.  Ear threads are my favorite style of earrings and of course, birds are my favorite subject, so it seemed fitting to end the year with favorites.


And the title I find inspiring as it intimates that we all have wings...all we need to do is decide where we want to fly to.  The New Year is bringing lots of new things to my life - new opportunities, new challenges, new experiences - and so I'm going to spread my wings and fly!


It's been wonderful to do this challenge and have other artists join me on the way.  I'll do some summary posts of the the whole challenge over the next couple of days, but in the meantime, click on the links below to see this week's birds.

I hope you'll spread your wings for 2012 too.

Friday, September 30, 2011

Merry go round - Write a simple tutorial - "Quick bird sculpture"

It's the last Friday of the month, so join us on our merry go round for a quick spin.  The merry go round is where a group of 11 artists/craftwomen link together around the world and tell you a little about their art and craft, through blogging on the same topic.


This month's topic is "Write a simple tutorial".  So here is mine: "Using plaster wrap to create a bird sculpture".

I first came across plaster wrap cloth at the beginning of this year when I was in Mexico in a class for encaustics....then more recently in another class. It's a very simple, and cheap media for whimsical sculptures. And quick to work with too.  The example here took me about 30 minutes to make.

Plaster wrap, is also called "rigid wrap" and a few other similar names. You can find it in the sculpture and clay area of craft stores.  It is like the product they used to make casts from in emergency rooms, if you broke your arm or leg. 

Here is what you'll need to make your own plaster wrap cloth sculpture:
  • 1 packet of plaster wrap cloth
  • Water
  • Aluminum foil
  • Masking tape
  • Scissors -  not your best
  • Paper towel
  • Acrylic paints
  • Dowels or wire - optional

    1. The first step is to create the basic shape of the sculpture using aluminum foil.  Squidge it into the general shape and if you need to add two parts together, for example, a head to a body, secure these with masking tape. The aluminum foil can be made into little flat pieces too for ears or wings etc and secured to the main part of the sculpture with masking tape.


    You can also use cardboard at this stage for some parts of the structure, again adding them to the foil with the masking tape.
      2. Now wrap the whole structure in masking tape, to keep the structure all together and provide a base for the plaster wrap


      3. Add any additions at this stage for hanging or supporting, such as dowels on the base for it to stand up, or wires to hang, or wires for feet


      4. Cut up the plaster wrap into small strips. The one I used is approx 4 inches wide and I cut it into approx. 1 cm strips.


      5. Quickly dip a strip of plaster wrap into the water in the cup and as you draw it out, drain it along the edge so some of the water comes off.


      6. Now apply the strip onto the sculpture base, pressing it into place.  Repeat with more strips, each overlapping on the sculpture.  You want to get between 1 and 2 strips thick all over the sculpture.


      You can cut the strips up into smaller sizes too, to attach to awkward shapes and get in small gaps. If you want plaster wrap on any of the dowels or other attachments, wrap those too.


      7. You have a choice now. If you leave this as it is, you will end up with a sculpture with texture to it that may by just the style you want.  If you want something smoother, go over the sculpture with a damp finger, rubbing each area so the holes in the cloth fill in with plaster.  This will give a smoother end product. The first photo below shows the area under the wing un-rubbed and the second photo shows it rubbed in, for a smoother finish.


      8.  Pat off the excess moisture on the wrap using a paper towel.


      9.  Leave to dry in the sun.  It'll take a  couple of hours. You can also put it on a warming plate if the sun isn't shining.  It'll dry hard and tough.


      10. Paint as you wish in acrylic paints, bend the wires, drill it, etc and enjoy your quick and easy sculpture!  I'll paint mine sometime during the coming week and show you the final sculpture then.

      *** LATEST NEWS 10/12/11 - I ended up finishing him off in tissue paper instead of paint. You can my blog post about it here and here is his photo:

      SOAR

      Here are a couple of photos of another bird I did and painted.  What this birdie is sat on, isn't finished yet, but it gives you an idea.


        Hope you'll give it a go - and if you do, please let me know!

        To find out what tutorial the other members of the merry go round have done this week,  click on the links below:

        Samantha at Vintage is for lovers - http://www.vintageisforlovers.com/
        Jen at Painted Fish Studio - http://paintedfishstudio.com/
        Bethany at Dirksen Dabbles - http://www.dirksendabbles.com/
        Laura at Blue Terracotta -  http://blueterracotta.com/
        Monika at Red2White - http://red2white.wordpress.com/
        Mitsy at ArtMind - http://artmind-etcetera.blogspot.com
        Kim at Vilt a la Kim - http://viltalakim.com/blog/
        Sara at Crafts of Texture - http://sarastexturecrafts.blogspot.com
        Mariana at Florcita - http://florcita.eu/wordpress/
        Agathe at Le Bar du Vent - http://lebarduvent.blogspot.com
        Ruth at Birdland Creations - http://insidetheartisan.blogspot.com

        Or else you can click on the blog hop below.  If you are a merry go round participant, please add your link if it's not already included. You can then copy the code and put it on your blog post too.

        Thursday, September 29, 2011

        The pool is still open

        It's been another warm week here in Northern California. As you can see from the photos below, it's a perfect temperature for a dip and the sun is keeping the water warm!


        Hope it's still dipping weather for you too.


        This little birdie is a commission for a great customer. 

        Wednesday, September 7, 2011

        36/52 Bird a week - Dan and Magnolia

        I'd like to introduce you to Dan and Magnolia.  They are two lovely little birds.  And although Magnolia sounds like she is delicate - like Dan, she is pretty tough.


        A little known fact about several varieties of birds is that instead of putting their surname (ie last name) after their first name, they put it in front of their first name.  Sounds a little odd, but that's how the birds do it. So yes, you've guessed it, these two little birds are known by their friends as Steely Dan and Steel Magnolia!

        They love hanging out together - and also with people.  They never seem to stay still - maybe they even have restless leg syndrome as their legs are always on the move.  But it's a nice little affect- looks like they are dancing all the time.


        Here they are with a larger member of their family.  He has an even odder name - Cutoats.  So yes, you've got it, he's Steel Cut Oats.

        In their other life, Dan and Magnolia are earrings made from steel clay, with silver dangly legs and feet.

        Check out the other birds made this week by following the links below:

        Friday, September 2, 2011

        Cockatoo designs

        You may recall that my "bird a week" post last week was a steel bird brooch, with magnetic "pin".  I wore it that evening that I finished it to see how secure it was, etc and went to a cocktail party.  A woman at the party whom I hadn't met before, commented on the pin and said she'd love to get one for her sister-in-law's birthday coming up and could I make one for her.  Of course, I gave her my card and that was it.

        She phoned a couple of days ago and said she'd like to go ahead.  How nice is that! She particularly asked if I could make the bird a cockatoo - and that, like mine, she wanted it "lighthearted" and whimsical.


        So here are a couple of quick sketches I've done of cockatoos, which I'll email her and see what she thinks.The bird on the right is very similar to the pin that I was wearing - just with a different beak and fluffed up feathers on his head.  The one of the left is a totally different style. Here is the one she saw:


        I think I like the one on the left best. What do you think?

        And while you are answering that question - here's another for you. We went for a lovely hike in Sugarloaf State Park today. We did the same last Saturday too.  We've just found this great 6 mile hike. The way up is reasonably "up" but then there is a picnic table perched right at the top, perfect for lunch.  But as we sat there today, we did begin to, wonder about the great people who took all the wood up there! Gosh, that must have been tiring. The path is narrow so no vehicle could do it...Anyhow,
        I'm digressing...the question I have for you is that on the way back, we walk through this open meadow area and it smells of rhubarb!  Lots of cooked rhubarb.  It's such a strong smell.  And delicious - especially for a rhubarb lover.  There are tiny white flowers in the meadow but they didn't seem to smell. Do you have any idea what could have caused the rhubarb smell? 

        Do let me know if you have any ideas.
        Enjoy the weekend xx