Showing posts with label bronze casting. Show all posts

Tuesday, May 31, 2011

Visit to a bronze foundry - Lost Wax Casting Method

Last week we went to visit a foundry in the Cotswolds area. It's called Pangolin, named after an African anteater!  We had a fascinating day and were amazed to see all the work involved in creating their massive bronze sculptures.  Our friends who were staying with us in Cheltenham had also been with us in San Miguel de Allende earlier in the year and they, like me, had tried their hand at  wax modelling for bronze casting, so it was especially interesting to see all the phases that our sculptures had gone through.

The pangolin foundry uses both the lost wax method and also sand casting, depending on the piece.

The lost wax method dates back at least 6,000 years and the technique has not changed very much.

1. The artist first creates his sculpture using wax, clay or some other media.

2.  A mold is then made of the original sculpture.  An outer rigid mold is made from plaster or clay and an inner flexible mold is made from rubber.  Molds can be two or three parts, depending on the overhangs and include shims (wedges or tapers) so the pieces can be put back together accurately.

Clay outer mold. The wedges are the shims

Outer rigid brown/white mold with pink rubber mold

 3. A wax cast is then made by painting molten wax into the rubber mold.  Once a thin layer has been painted on, wax is poured in and out of the mold to create a thickness of 1/8" - 1/4" of wax over the whole rubber mold.

Wax in the rubber and plaster mold

4. When the wax has cooled and set, it is carefully removed from the rubber mold. A system of wax rods (runners) are then added to the wax.  These will allow the bronze/silver/gold to run into the sculpture.  Small rods (risers) are also added to allow air to escape as the metal runs in.


Refining the wax models and adding risers and runners

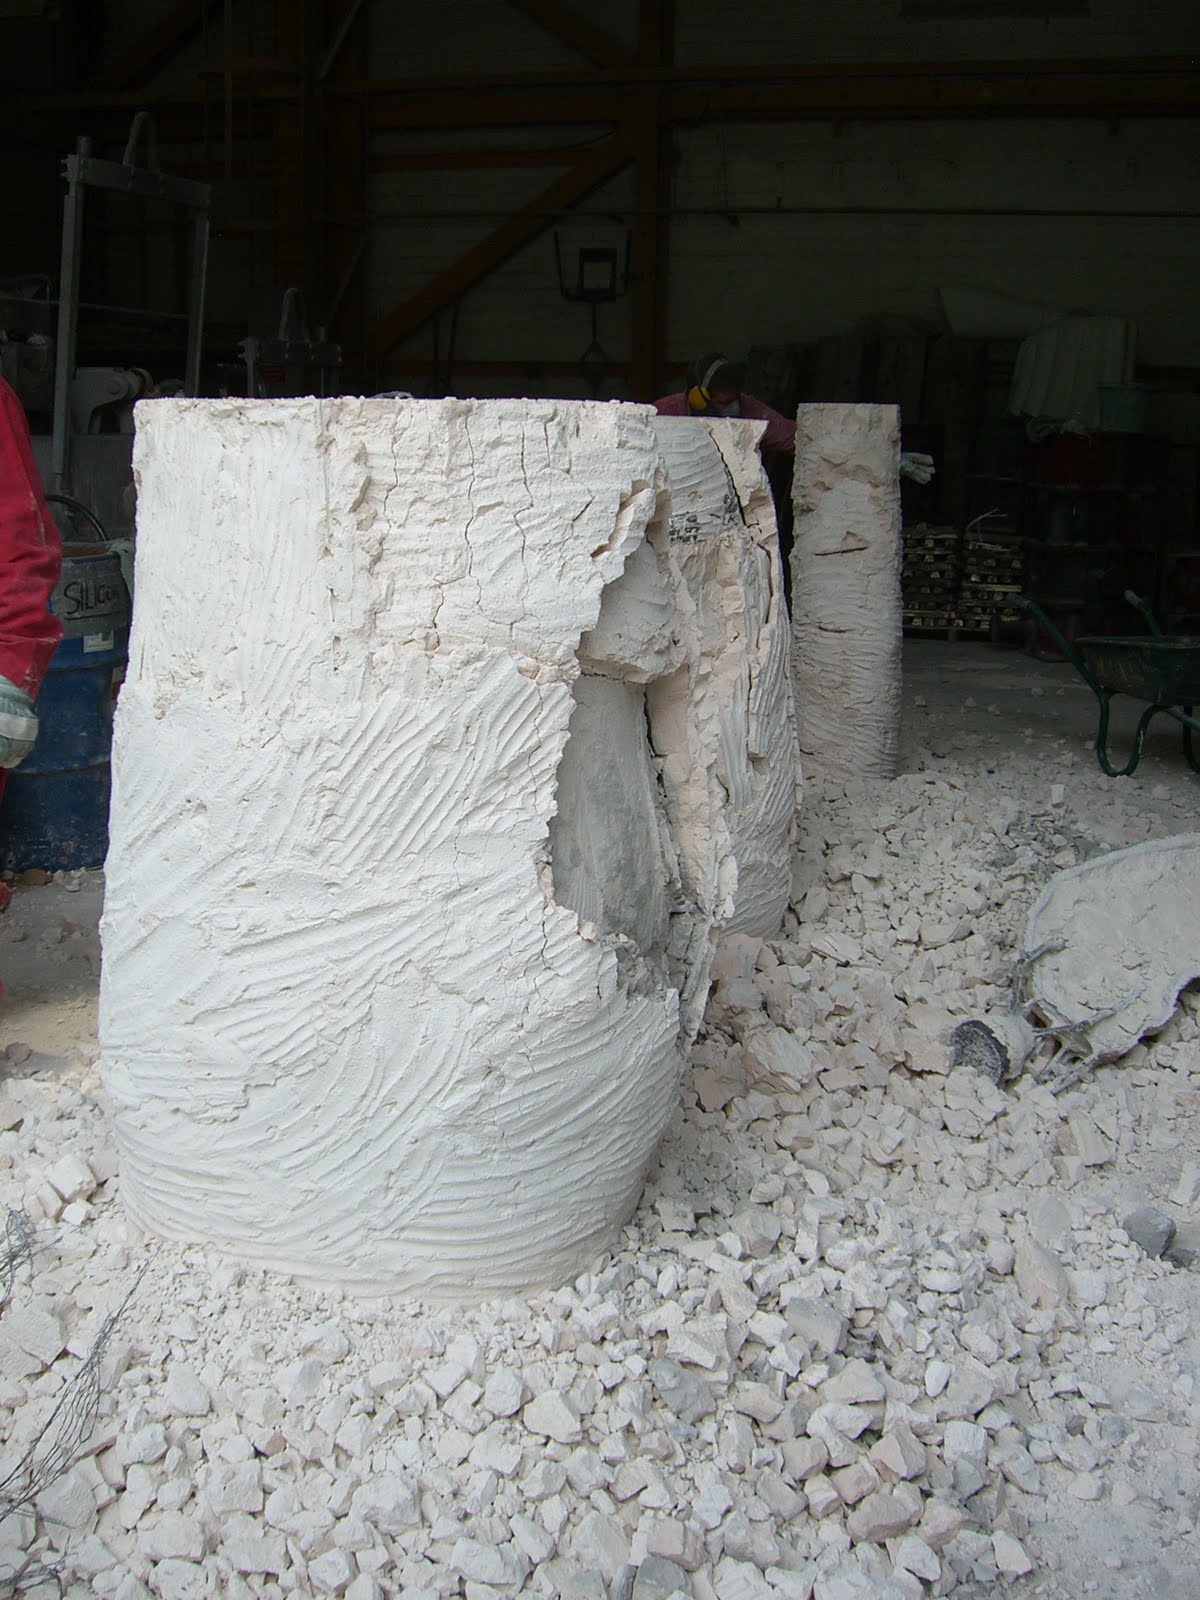
5. The wax model is then encased in another mold able to withstand high temperatures, so that the wax can be melted out.  This mold is made from grog - a crushed, fired clay mixed with plaster.  The grog sets quickly and a hard block is formed around the wax.  This same mixture is also poured inside the wax to form the core, as the final sculpture will be hollow.


6. The finished block is then placed upside down in a kiln and heated upto 700 degrees C. This melts the wax out of the mold.

The kiln

7. After the mold cool, they are turned the right way up and filled with molten bronze. The metal fills all the space left by the melted wax and the sculpture, including the runners and risers.

8. Once the metal cools, the mould is broken open and the raw cast sculpture is revealed.  Cracks are filled with bronze, and the risers and runners are removed.


9. The final process is then patination and a large range of colors are available.

I'll show you a little of the sand casting process on Thursday and also some final pieces...but here is one of my favorites for now:

Dodo by Nick Bibby

Wednesday, February 2, 2011

5/52 - Bird a week - A bird in the hand

Time for another "bird a week" (- my little challenge group where we make a different bird each week using whatever media we like).

This week, my birdie is based on a phrase that means a lot to me - "A bird in the hand." If you read my blog regularly, you'll see that each Saturday I write a "bird in the hand" blog post which lists the things I'm grateful for that week, as I see the saying "a bird in the hand is worth two in the bush"  is all about being grateful for what we have.


This is my first wax sculpture. The hand is life size.  The two pieces are going off to be cast in bronze.  My first bronze sculpture! I'm quite excited by the prospect of it.

The photos are from different stages along the way and not the final pieces.  We'll wait until they are in bronze to see how my final refining and details came along.


The pieces will remain separate - not connected - so that you can pick them up and change the position etc. 

I loved working with the wax.  I really like how the hot tools just glide into it...how you can add and take away easily - and how you can add so many details. I learned under Rita Torlen, here in San Miguel. She is the same teacher that I had for my "girl with the bird in her hair" clay sculpture.  I've so enjoyed my classes with her.  They all called me "the bird lady" in class!


Doing the bird was fascinating. With most of my jewelry, I like simple designs, not much fuss or texture, but with this bird, I thought I'd try something different and put all the little feather patterns in. It was such fun to do.  And doing something life size was a welcome relief after all the tiny jewelry sculpting I do!


I know I will be doing more bronze sculptures when I get home, using the wax for models.  Here in Mexico, the price for having it cast in bronze is very reasonable - can't say the same for the US ...but maybe I'll just ship them back down here.


There are a good group of us doing the "bird a week" challenge so I hope you'll take the chance to look at some of the others by following the links below.  Hopefully those in the challenge will add their blog post link or flickr photo link. If you would like to join us in the challenge, you are most welcome.  Click on the flickr group link for more info.